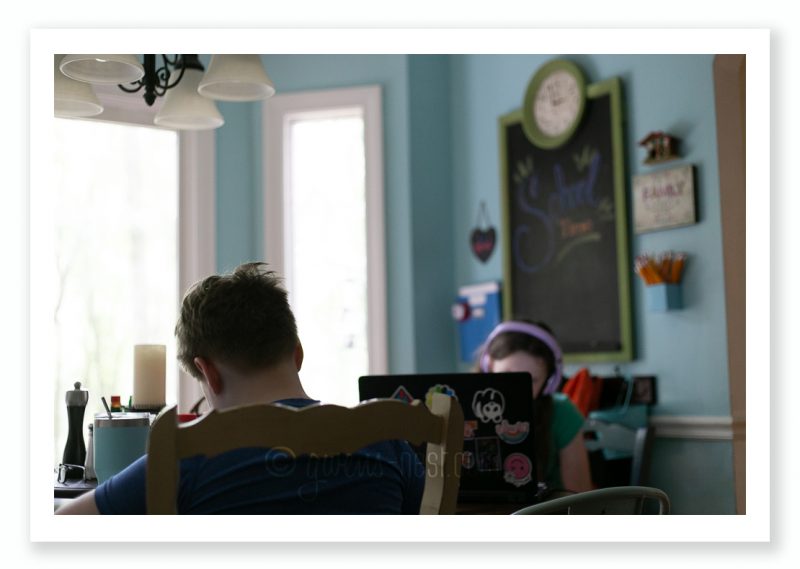
 My favorite home school room ideas, pulled together into one stylish wall. I wanted a simplified and cozy school space that would keep those busy bottoms in their chairs instead of dashing off for missing supplies. And I wanted it to be central to family life, and inspiring in a way that we could all enjoy. I think we’ve accomplished it! I was able to pull this together using items I already had from former iterations of my home school room, but I’ve provided Amazon affiliate links for your convenience below for similar products.
My Home School Room Experience
My schooling options resume is extensive. Home school, Virtual School, Brick and Mortar? CHECK, CHECK, CHECK.
We’ve explored a wide variety of schooling options with our kids, ranging from public school to homeschooling in a big dedicated homeschool room. My older two children did many years of online school. But the pandemic chose for us this year, and like so many other families around the globe, we ended up doing a hybrid distance / brick and mortar learning model with our local schools. We are still on the same roller coaster this year.
I LOVE ideas, AND to over-think/over-prepare. It’s my special gift. So I have seen and tried TONS of Pinterest homeschool room ideas through the years. I started out using my whole basement as a dedicated home school room with vintage school desks for each student, and even a sanity saving toddler activity drawer. The walls were lined with bookshelves, games, activities, globes, maps, and a 3-D Alphabet wall. (Thank you Pinterest!)
But as our kids grew and changed, our needs and our space changed as well. As much as I’m NOT a minimalist, I decided that I didn’t want to be a school administrator/librarian/janitor for a huge school space. And I really valued being able to be in the same room with my kids WHILE ALSO being able to get my own work done. That called for more of an open concept than what we had before.
This home school wall was born out of a new commitment to helping my kids take personal responsibility for their education and supplies. Tidy, push your chair in, and keep your things together are LIFE LESSONS that we all need, right? Plus: it needed to fit in with my vintage design aesthetic and feel like home.
No matter what type of schooling you’re doing, this is a versatile system that can organize your students and your space. I boiled down to the top 5 things I wanted for our space:
My Top 5 Priorities for our Home School Room:
When you’re setting up a place to do school at home, your design and organization choices are really endless. You can personalize it to reflect your style, and for what works best for you and your child(ren). Whether you’ve got a dedicated homeschool room or are using just a nook for distance learning, or just setting up a spot for homework, these home school room ideas can simplify and brighten up your learning space. And the best part? I used items that I already had around my home!
I’m back to basics-these are the key things that I knew I wanted for our home school room…
- Accessibility: I wanted a one stop, easy access drop zone for EVERYONE to hang up jackets, and put away their school gear. Ideally, it needed to be on the way in from the garage. I also wanted a school space in the heart of my home, so I can swap laundry, toss dinner into the crock pot, and enjoy a cup of coffee while keeping an eye on my learners.
- Table space: I wanted a gathering spot where there was room for all of us to sit together, even though the kids study more independently now than when they were little. We still like to get together for family meetings, meals, projects, and work sessions.
- Tidy and INDIVIDUALIZED Storage: Since this was going to be centrally located, I knew I needed this to be a system that was easy for all of us to KEEP tidy. I wanted to have a neat and portable way for the kids to keep up with THEIR OWN daily school materials and supplies. Since we are also doing brick and mortar school, as well as distance learning, backpacks were a natural choice.
- Essentials ONLY: With the kid’s daily school stuff sorted out, what about all of the other classroom “stuff”? I knew I didn’t want or need our entire collection of art and office supplies on display. Just. What. We. Need. It’s SO much easier to keep up with and clean up after. It’s a theme. All of the other supplies live in my office closet.
- Portable: Backpacks for the win again! We *can* certainly all work in the same space, and we often do. But this setup also allows for my introvert kiddo to grab her backpack and seek solitude with her book on the back porch hammock or down by the creek. Using this wall system even allows us to hit the road on a spontaneous adventure with all of our school necessities in tow Laptops or Chromebooks make even digital schooling portable and possible. My kids have laptop bags with handles, so they easily store on their hook with their backpack and jacket. I even keep a Mom tote (with my library card in a luggage tag on the handle), and I can toss in my own snacks or current read, and grab that on the way out the door.
Finding the Perfect Home School Room Location
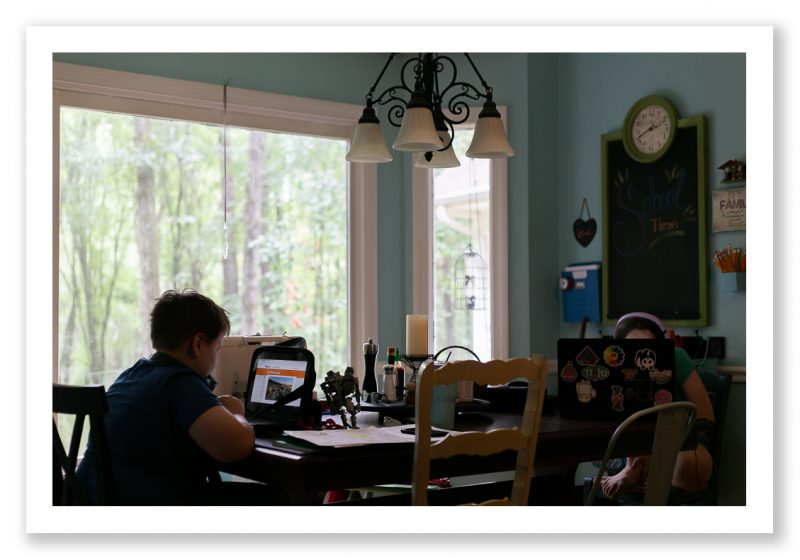
For us, this breakfast table is an ideal solution that hits all 5 of my requirements for our perfect homeschool room. The big picture window spills natural light into the room, and affords us an inspiring and therapeutic look at nature. It’s right off of the garage and laundry room, and open to the kitchen. We are in the heart of the home and my kids and I have the visual contact we need. Just like Goldilocks, it’s not too big, and not too small…it’s just right! But I really only had one wall to make this happen…and not enough room for even one bookshelf!
*insert dramatic music* Is it EVEN a home school room without a single bookshelf?
Why NO BOOKSHELVES?
I mega heart bookcases. Bookshelves are one of the main components of most home school room designs. They were one of my first purchases when I started homeschooling. Bookshelves are a wonderful solution for storing large collections of books, learning games, and supplies.
But hear me out: it was too much visual clutter for a work space. It was not only overwhelming to me, it was a constant visual stimulus and distraction for the kids (I’m looking at you, games and manipulatives!)
I have plenty of shelving in my home- in fact, I turned the “formal living room” into a library filled with shelving. The games and all other books live in the library now, and I am SO relieved. This has worked amazingly well for us, because the library is now a space to go to enjoy mental stimulation and the joy of books AFTER you complete your daily school work.
*AMEN*
Even if you don’t have a dedicated room for reading, consider setting up bookshelves in an alternative space if you have visually distractible day~dreamy kiddos like mine.
My 10 MUST HAVES for a School Wall
Now that I had my spot picked out, I had to choose which items we actually did need and want for the school inspiration wall. As I said above, I did have all of these items already, and simply repurposed them from around my home, and thus already fit my style, but you can make this your own, to blend into your home and style!
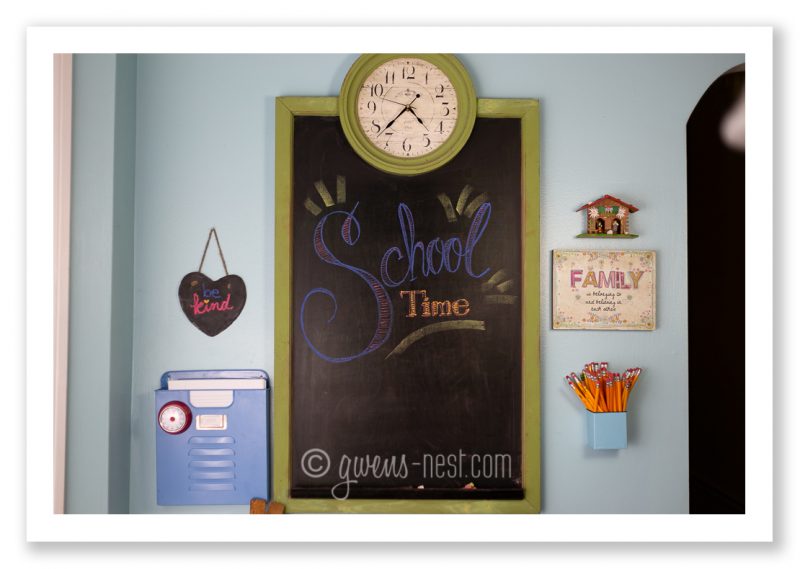
The vintage weather center and folky artwork are style bonuses, but EVERYTHING else here has an important job. Here’s an up close tour of the whole wall, with highlights of each key element. I’ll give Amazon affiliate links for similar items in the descriptions:
-
A Clock
I need a big clock in each room. The focus of our homeschool room wall is a large blackboard that happens to have a clock built in. But there are SO many awesome retro and stylish wall clocks out there, that you can really build a wall that suits your taste and home. If your kids (or you) are spacial/visual learners, I highly recommend a traditional clock with a face and numbers…it helps you learn to visualize time increments on the face. Unlike digital clocks, you can see how much 15 minutes is on the clock face vs a half hour. I really like this one.
-
Blackboard:
I use the blackboard to set the tone or mood for the home classroom. Because my kids are old enough to be responsible for their own schedules and assignments, I don’t use the blackboard for schedules or list. I use the blackboard for inspirational quotes or to keep it light and fun. It’s a great spot to post announcements, countdown to a special event, or to post reminders that apply to your family. We have even used it to plan out and post our Thanksgiving menu! Here’s a highly rated magnetic chalk board that comes in several colors and sizes.
-
HEAVY DUTY wall coat rack:
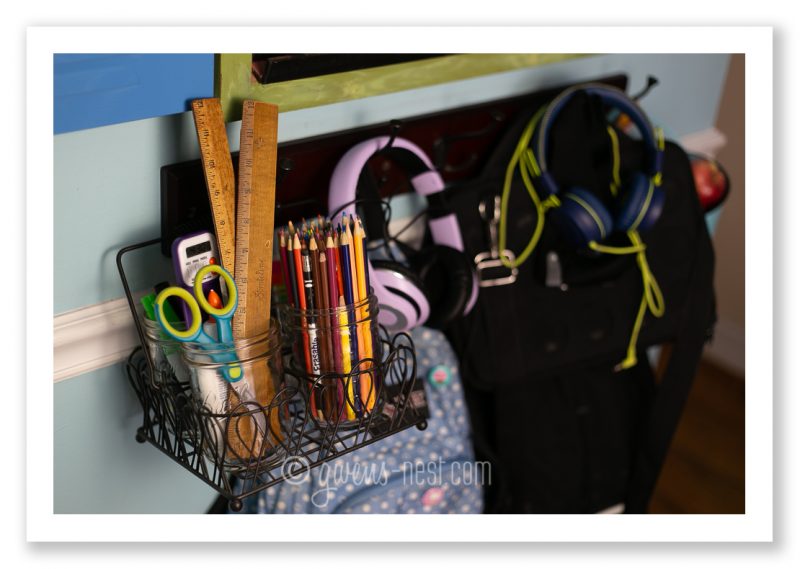
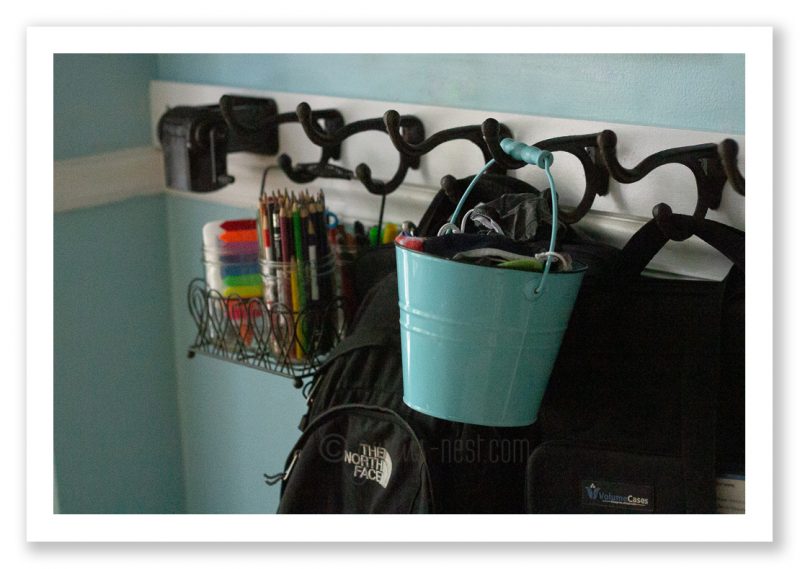
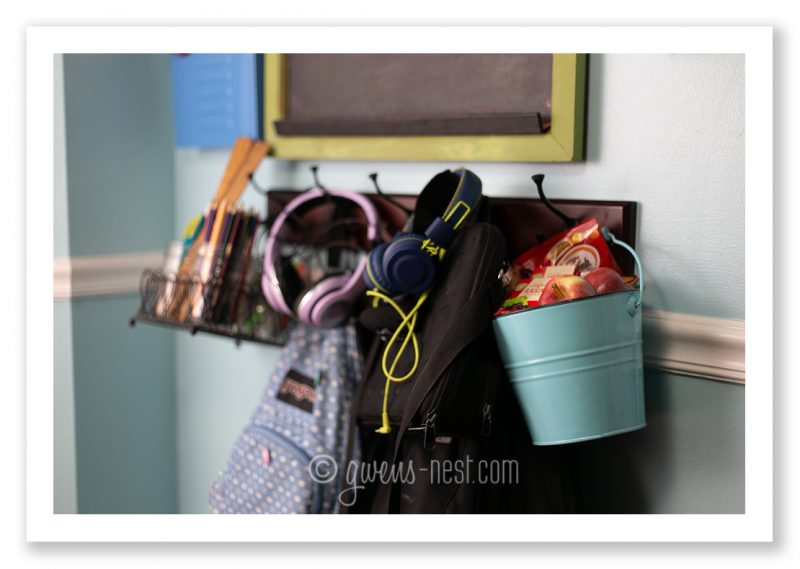
Below the blackboard, I opted for a wall mounted coat rack. I wanted something that we could screw into the studs, and that could really hold weight: meaning several loaded up backpacks plus laptop bags! I liked having more than one prong per hook, as they can store their backpack, jacket, and their laptop bag all on the same hook. So grab that stud finder and some heavy duty long screws and make it SOLID! Above is my current VERY solid coat rack that I give more info on in the update at the end. Since my kids are back in brick and mortar, the snack bucket has been repurposed to the mask bucket. The rack below was one I had on hand when we originally set up the wall. It NOT designed to support the weight of a locker full of books on the scrawny hooks, which are already starting to bend in the photo below.If you live near a Hobby Lobby, they usually have a good selection. I opted for larger 6.5 inch hooks vs the standard 4″. Amazon carries similar hooks that are about 4″ deep in two prong hooks or 3 prong styles.
-
BACKPACKS:
The obvious non-bookshelf, personalized storage solution (especially if your child does a combination of distance and “brick and mortar” or in school learning) was that each kid has THEIR OWN backpack to keep all of their gear in. I would TOTALLY do this now, even if we were full time homeschooling, as it simplifies life so much. Each kid gets to pick their own gear. And they also have to learn the IMPORTANT life skills that go into keeping their supplies tidy and organized. And we can roll out in a heartbeat if we want to.
It’s a WIN*WIN*WIN.
Sidenote: it’s worth it to buy a quality backpack…we found a photo of my daughter on her first day of school five years ago, and we realized that she was STILL using the same JanSport backpack! Here’s their Amazon store. -
Snack Bucket:
Brains love and run on carbs, so I keep a stash of grab and go snacks here that we can access during our snack times. Again, it cuts down on time spent foraging and rummaging through the cabinets. Here’s a set of two wall mounted holders that would work great for pencils and snacks or masks. 🙂

-
Caddy:
This idea has carried through all of my iterations of homeschooling: the art caddy. I love being able to grab or put away just ONE caddy for all of our art and craft needs. These are the things we use 90% of the time. The kids each have scissors and glue sticks in their pencil bags, so there wasn’t a need to put those in the caddy. I keep my favorite signing pen here to keep it on hand. This specific caddy was sold in the canning jar area several years ago. I like the clear glass jars, and that I can remove them individually as needed. But there were times in my life where a metal caddy like this would have made a lot more sense. 🙂
-
Timer:
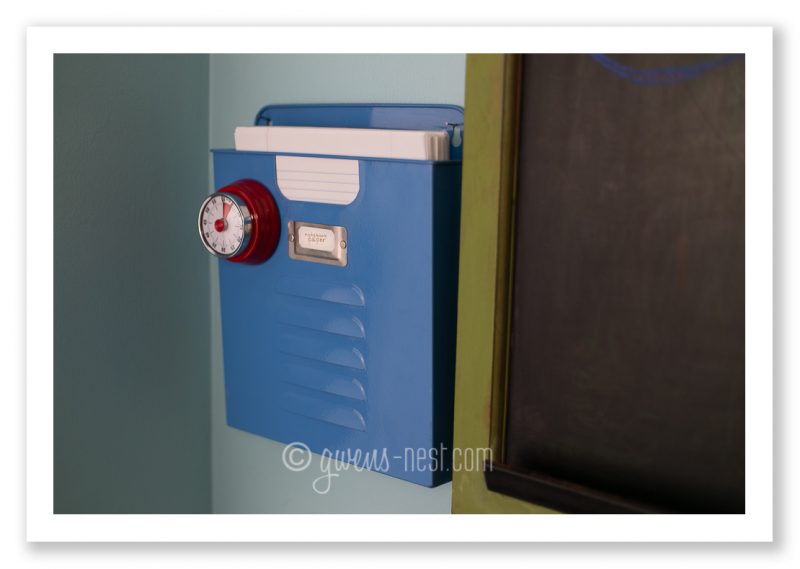
I LOVE this vintage magnetic mechanical timer. We have several visual learners (myself included) and this actually lets them see how much time is left with a red panel that covers the timer face as you turn it. SO SMART! It really helps us visualize time. This is great for setting realistic goals for (not so fun) activities or assignments. “Read for 5 more minutes, and then you can go outside”, or “I bet you could load that dishwasher in less than 5 minutes!” This is an AWESOME 6″ timer for the visual learner!
-
Wall Pockets:
The two most important school supplies, even in this digital age, are paper and pencils. Each one gets a dedicated spot on the wall. We use a lot of scratch paper! I also store frequently used learning aids here to keep them easily accessible…like the laminated multiplication chart that one of mine uses daily for math homework. Here’s a nice woven wire version on Amazon.
-
Crate:
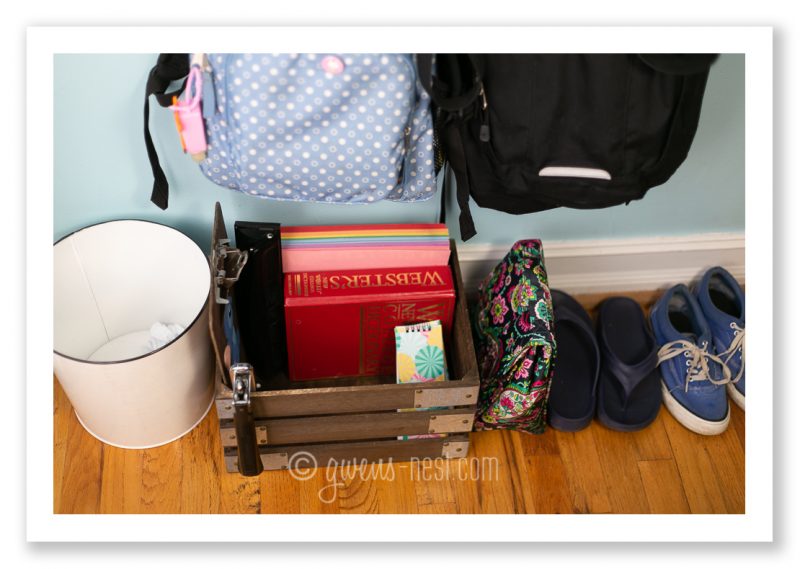
This is where I store Mom stuff, the dictionary, hole punch, stapler, and clipboards. These are items that we all use frequently, so we need them at hand but not on display. Here’s a set of two really lovely storage crates.
-
Trash Can:
My. Kids. Make. Trash. Having a waste paper basket cuts down on “field trips” to throw something away. I heart this one!
One Year Home School Room Update
After using these simplified simple homeschool room ideas for a year, we are super happy with the system! It’s easy for me to tell in one glance who needs to tidy up, or who has not put their items back on the rack. It has helped us all be individually responsible for our own messes and materials. My only responsibilities are keeping the bucket filled (snacks have had to be swapped out for clean masks) and updating the messages on the board to keep us all inspired. We have enjoyed using our school inspiration wall, and look forward to spending time in the space daily.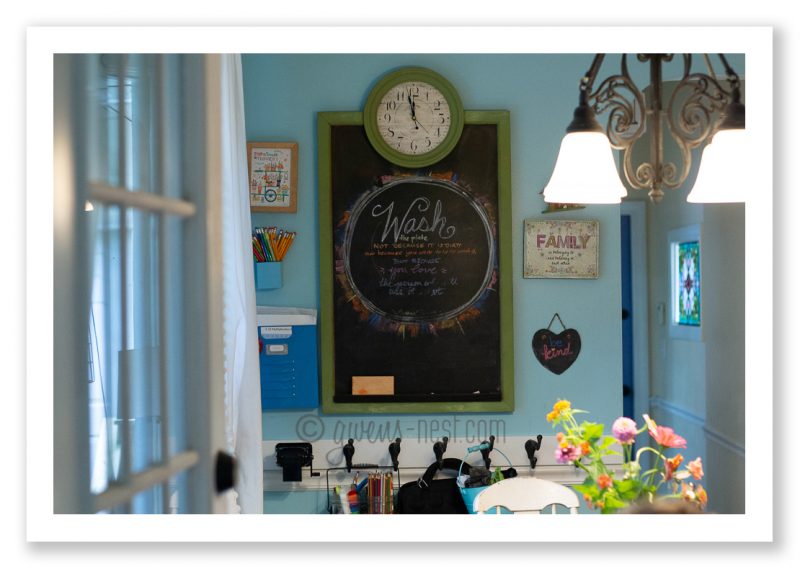
What did I change?
Almost right away, I slightly rearranged the wall so the pencil cup won’t get bumped accidentally. We realized the first week that it needed to go on the inside corner, or we were playing pick up sticks twice a day with the pencils.
Recently, I added an AWESOME vintage style pencil sharpener above the trash can. Highly recommend! THIS X-acto sharpener in particular. This is the exact model that I mounted in my office/art studio and I love it so much. It sharpens like a DREAM, and ticks all of my retro style boxes. Another reason for this was that there were MULTIPLE field trips to the electric pencil sharpener across the room, and that thing is LOUD and disruptive. This is silent, and beautiful. 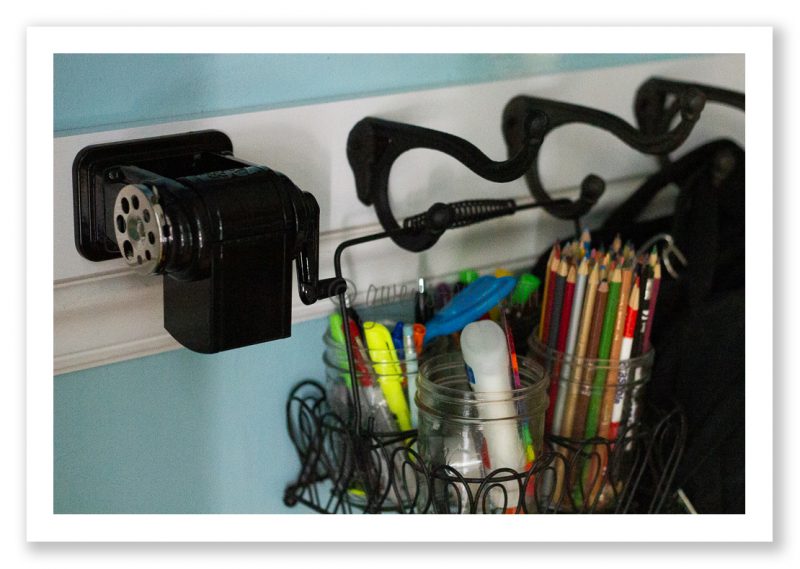
But the biggest change is the one that I knew I was going to have to make eventually. The cheapie coat rack I put up began to FAIL within 6 months. The dinky little hooks weren’t built for holding up a locker full of books plus a chromebook.
SO I FIXED IT.
- I bought an $8 pre-primed board at the home improvement store, and paid around $15 for a set of 6 substantial cast iron hooks from Hobby Lobby.
- After cutting the board down to size, I marked the wall studs in pencil, and then marked my board where the studs would be when I was ready to mount it.
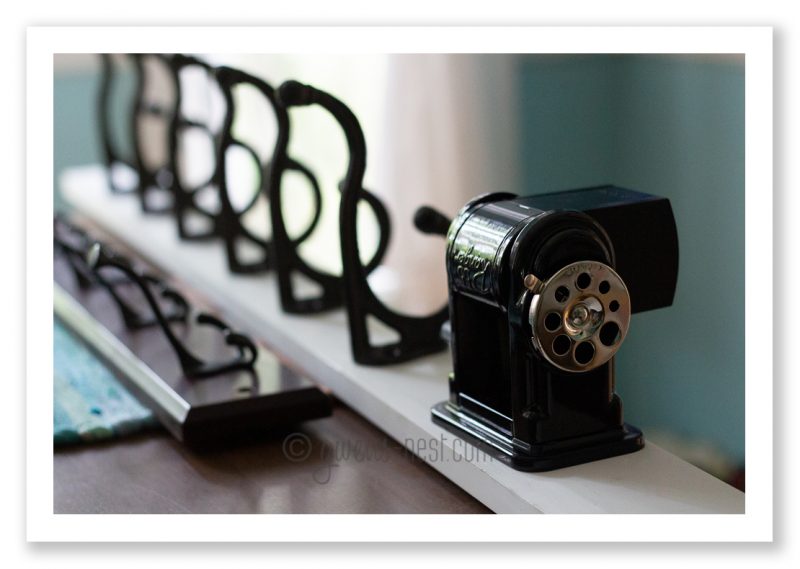
- I didn’t want a bunch of extra screws showing. So I arranged the hooks to cover the stud marks so the screws that hold the board up would be hidden once I mounted the hooks.
- Next, I marked the screw holes for everything by making indents with an awl (because it’s too easy to cover the pencil marks on the final coat of paint.)
- I added the final coat of paint and let it dry overnight
- The next day, I mounted the board into the studs, using long screws.
- Finally, I mounted the hooks and the pencil sharpener into the previously marked dents.
It took less than an hour, all told, split into two work sessions. If you’d like to see a step by step post on the coat rack, let me know in the comments below. 🙂
Do you think some of these home school room ideas would work for your family? I would love to see your style of a one wall school room!
Read More of my Home School Ideas
- For Toddlers, this Busy Drawer was a SANITY saver!
- Or make DIY block crayons that are perfect for little hands!
- This is one of my favorite story books.
- Check out this EASY visual organization tool for helping you and your kids stay ORGANIZED with Color!
Want More Home School Room Ideas and Inspiration?
Check out my Homeschool Room Ideas Pinterest board!
Leave a Reply