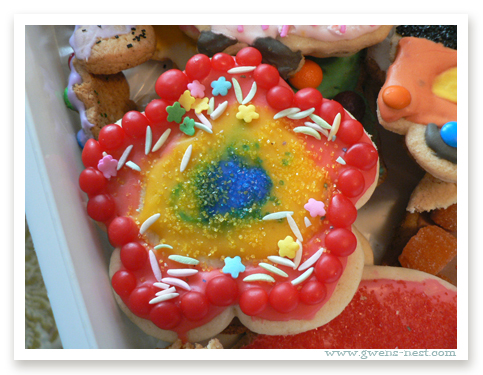
 This basic sugar cookie frosting recipe is what I use every year for our big sugar cookie decorating shebang. It’s super simple to make, and it can be tinted into a rainbow of colors, thinned out and painted on, or even piped through at tip for outlining or details. It’s somewhere between a buttercream frosting and a glaze.
This is my frosting of choice for our family cookie decorating fest each year, using the Easy Sugar Cookie Recipes I posted earlier. This combination will give you soft, delicious, and flavorful cookies that, as you can see, can stand up to a pretty heavy load of candy toppings.
First, I’ll give you some great tips for decorating with this yummy frosting, and then I’ll post the printable recipe at the end.
 This sugar cookie frosting is just the right amount of shiny, crisp when dry, and creamy inside. It’s is very flavorful, thanks to the butter and extracts.
If I’m making fancy cookies, or cookies that need to travel, I highly suggest the Sugar Cooking Icing recipe that I have posted here. It’s lovely, and dries to a nice crisp satiny finish.
Tips for Sugar Cookie Frosting
When your frosting is mixed, scoop out the amount you’ll want for piping or thicker spreading first. Then I thin down and divide into plastic (disposable) cups to tint.
There are re-usable piping bags, but I they’re no fun to clean up afterwards. I just use quart freezer bags as piping bags. This is what you’ll need:
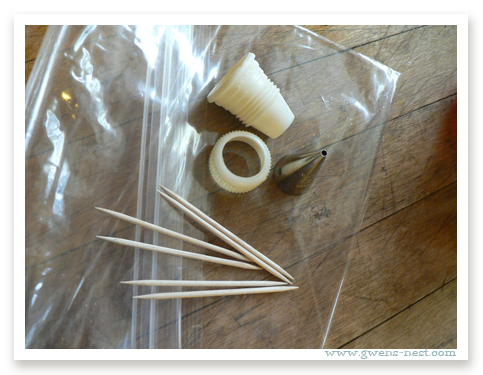
For each piping bag, you’ll need one icing coupler and tip, one freezer bag, and I like toothpicks on hand to clear any dried frosting as we go.
I prepare them like this:
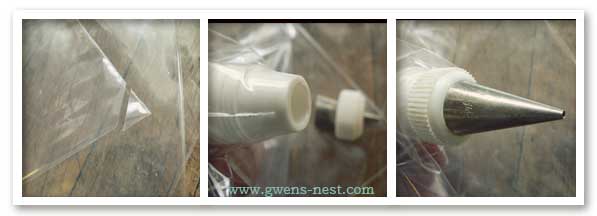 Snip a tiny bit from the corner of your quart bag. It’s really better to cut it too small, and have to stretch it open a bit, than to cut it too big and have the frosting squish out. Unscrew the end off of the coupling tip, and insert the coupler into the bag, and through the hole you just cut. Finally, put the tip through the coupling collar, and screw it all together. Then fill with the frosting color of your choice.
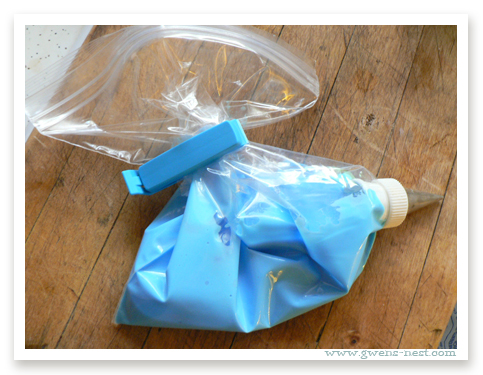 I love these little chip clips for keeping the bags closed!
Tinting Your Sugar Cookie Frosting
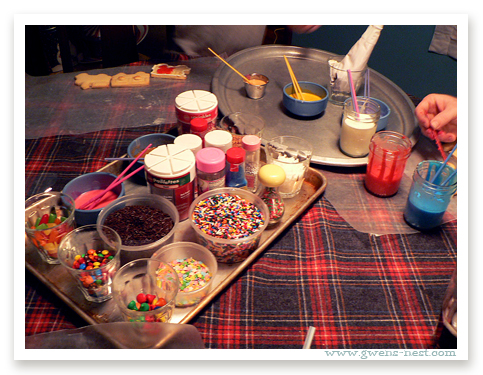
This is our setup…but I have since switched to a vinyl tablecloth and plastic cups for the frosting colors.
We like to “paint” most of our frosting on with little cheapie paint brushes, and we LOVE using lots of colors! This is what I do:
Mix your whole batch of frosting…you want it to be on the thicker side. After you fill your piping bags, choose how many colors of paint-able frosting you want.
I divide it into disposable cups, and add a splash of milk (or cherry juice, or chocolate syrup, depending on the color) to about a half cup of the thicker frosting. I like to get it thinned down to the consistency of Elmer’s school glue. It will look like this, and the drizzle will stay on the surface for 5-6 seconds before disappearing. If you need more milk, add it in one teaspoon increments.
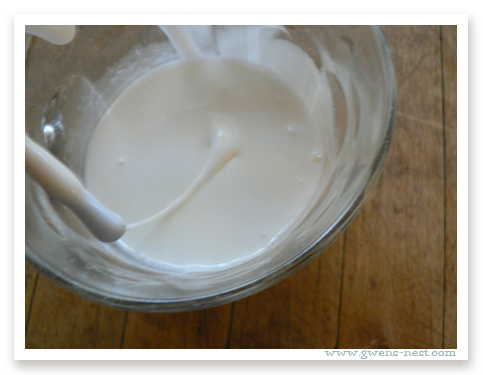 I add a few drops of food coloring, and pass the cup and a brush to a kid-helper for stirring.
We usually make one piping bag with white, and then make cups with paintable frosting in these colors:
white, red, green, brown (chocolate), purple, pink, yellow, and small amounts of black and orange or flesh tones.
Another great tip I’ve discovered is to add flavorful ‘tint’ aids. We usually make brown or black, but they tasted SO chemically and icky from all the food coloring. Then, I had the idea to add about a couple of teaspoons of cocoa powder, and a bit of milk to thin down, and it just takes a little bit of coloring to make it black. I also add cherry juice instead of milk to the red and pink colors, to thin, and add some flavor. 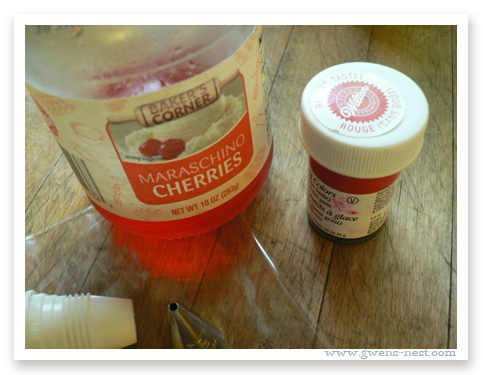 I used to use the gel colors for really vibrant, concentrated color, and they last for years and years. But the lids leaked, and they were SO messy to work with. I’ve since discovered these gel colors by Ameri Color that are just as vibrant, and come in neat little squeeze bottles. DEFINITELY worth it not to have to mess with the mess anymore! And they should last through literally years of use. (My Hobby Lobby carries them!)
These are also on my wish list…a healthier alternative to standard food coloring, and the three color set makes this whole array of lovely colors!
After we get the table set up with all of our beautiful frosting colors, sprinkles, and candy, the painting party begins! I like to start out by base-coating the cookies, and letting them dry for about 10 minutes, until a crust has formed, which gives a pretty, glossy base to work on.
 The blue snowflake cookie has a base coat with sprinkles, and then white was piped over the top for a 3D effect. The candy and sprinkle artists apply their goods while the frosting is still wet.
When we’re done decorating each cookie, we put them on a drying rack with wax paper under it. We let this frosting dry overnight, and then stack the cookies for storage. They hold up well with wax paper between each layer.
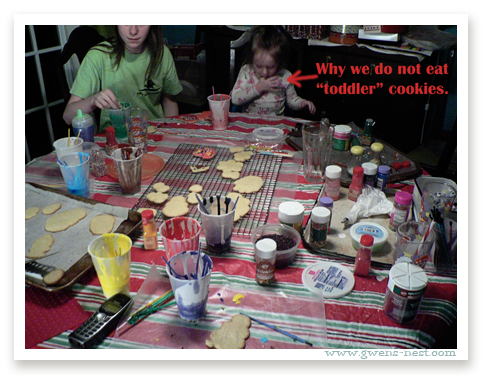
And the final sugar cookie frosting tip?
- ¼ cup butter (half a stick)
- 3 cups confectioners' sugar
- 1½ teaspoons vanilla extract, or
- ¼ t. lemon extract- optional
- ¼ t. vanilla butter nut flavoring- optional
- 2+ tablespoons milk, plus more to thin as needed
- Add all ingredients to the mixer, and blend until fluffy.
- Take out the amount you want of the thicker frosting for piping or spreading.
- Thin down the remainder to paint on, using about 1 T. of milk per half cup of frosting, and then adding 1 teaspoon at a time until you get a school glue consistency.
- Tint as desired- I prefer gel coloring.
You may add maraschino cherry juice to thin and flavor the red and pink frosting, adding in gel color to get the desired final tint.
We usually make one piping bag with white, and then make cups with paintable frosting in these colors:
white, red, green, brown (chocolate), purple, pink, yellow, and small amounts of black and orange or flesh tones.


[…] navigation ← Easy Sugar Cookie Recipes Sugar Cookie Frosting → Sugar Cookie Icing Posted on December 14, 2012 by […]